Create Ephemeral Pass
0. Turn to the MoonChute and create 2FA wallet
First, navigate to MoonChute and set up a 2FA wallet if you have not created one, selecting either email or passkey as your second factor of authentication.
1. Specify passkey and expiration date
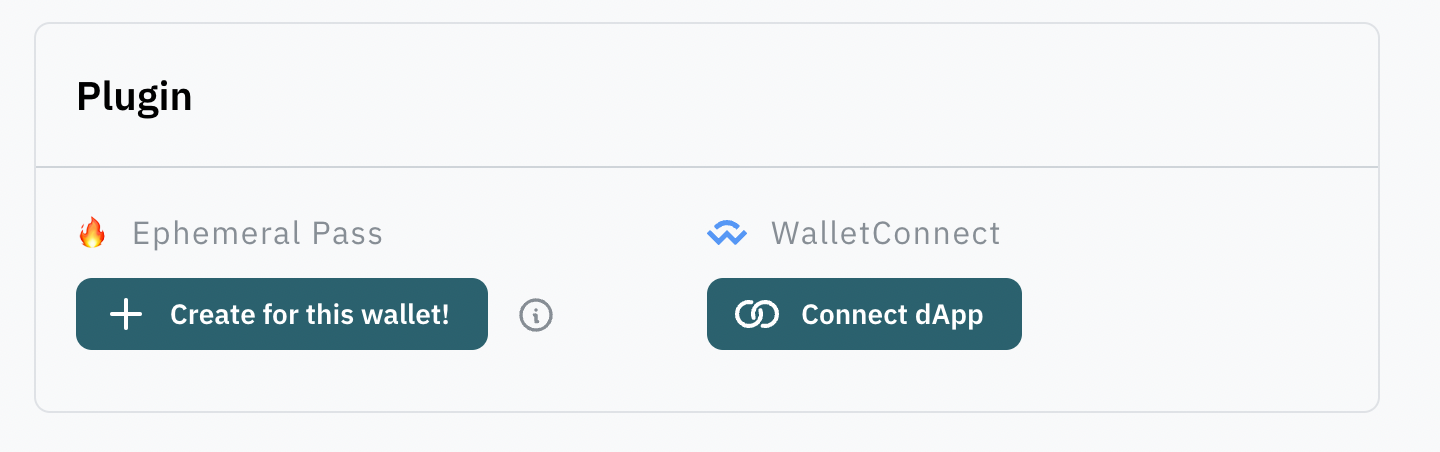
Once your 2FA wallet is ready, locate the Ephemeral Pass feature under the "Plugin" section and click on "Create for this wallet!"
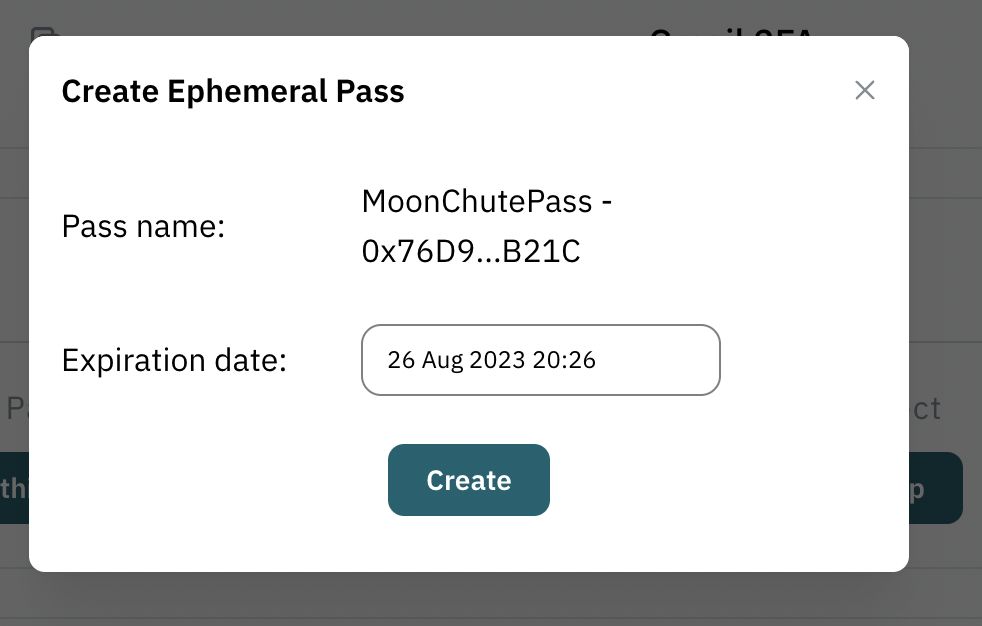
Upon clicking, you'll be prompted to select an expiration date, which determines how long your Ephemeral Pass will remain active. After specifying the expiration date, click on "Create."
2. Create ephemeral pass
If you haven't already set up an Ephemeral Pass before, you'll need to create a unique passkey. This passkey will be uniquely associated with your smart account, and its label will include the suffix of your smart account address for easy identification.
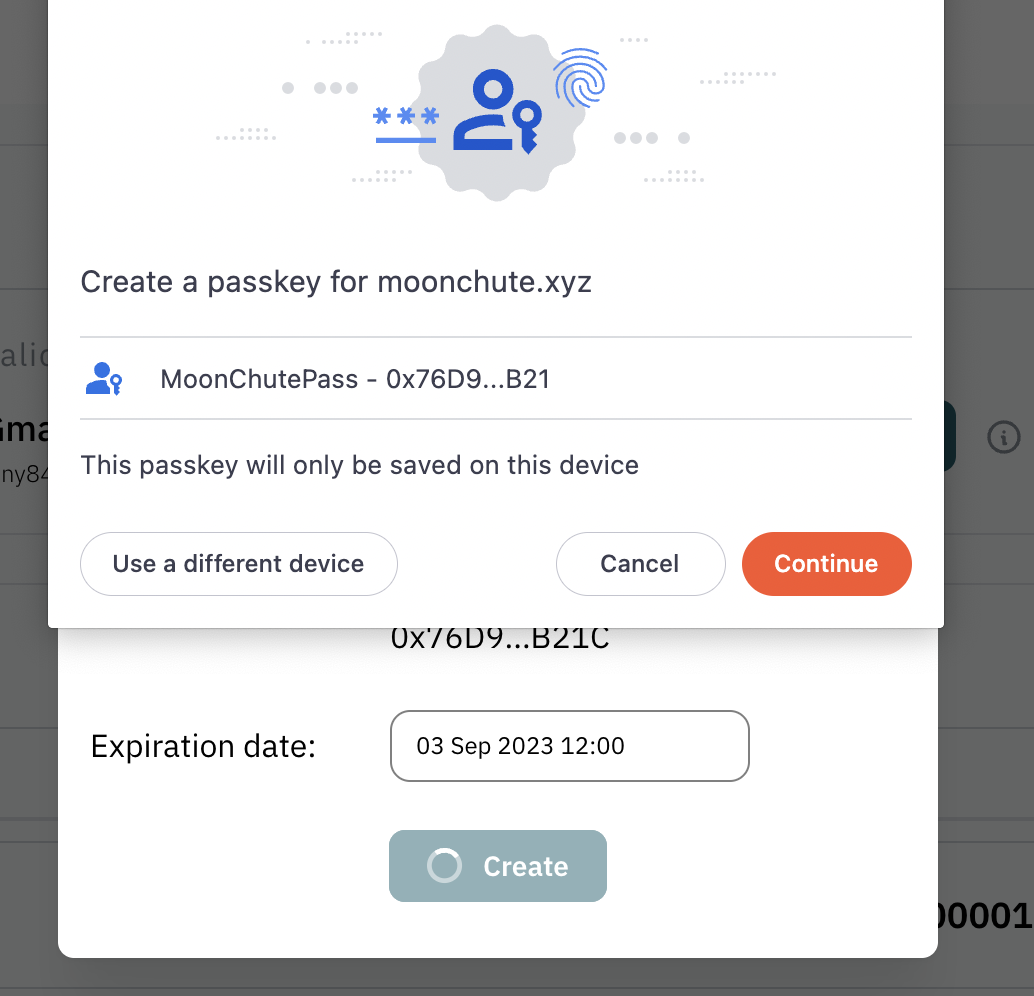
After confirming the expiration date and passkey, proceed to send the user operations required to activate the Ephemeral Pass on-chain. This ensures that only you have access to the Ephemeral Pass.
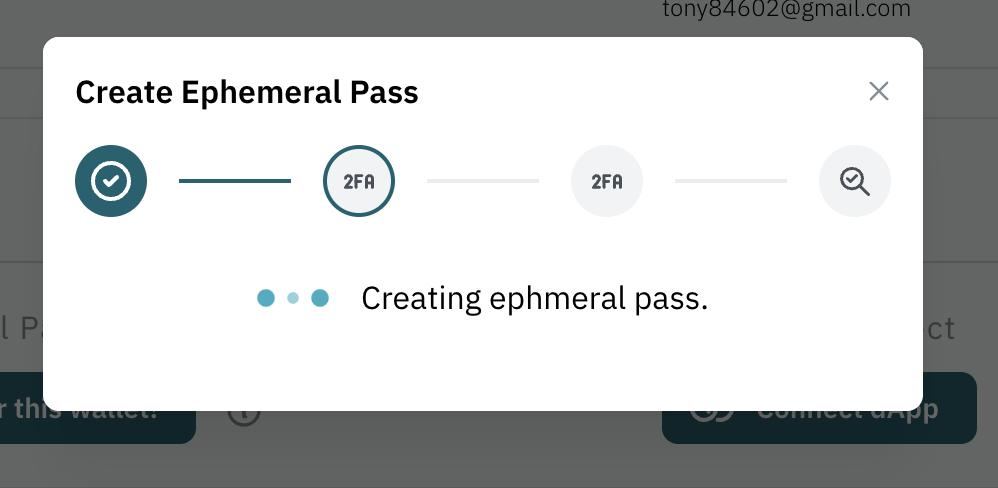
Two separate user operations will be conducted to initialize your Ephemeral Pass. The first operation sets the expiration date within your smart account, while the second stores the passkey in the plugin contract.
3. Congratulation
You've successfully created your Ephemeral Pass! You can now view its details, including the passkey and expiration date, within the Plugin section.

In the following segment, we'll show how to effortlessly execute transactions using your Ephemeral Pass on dApps that support the MoonChute wallet.